3 simple things to make with lolly sticks
Little people love spending time making things - it's great to help them learn through play, give them a sense of achievement and unleash their inner creativity.
Sadly, some craft ideas can be too complicated and messy, even with adult supervision. But, fear not. We've created three, straightforward, hassle-free lolly stick craft ideas so your little ones can get hands-on, without tiring you out.
Each craft project uses wooden lolly sticks as the main focus for these mini craft projects, so you can do your bit to be more sustainable by recycling old ice lolly sticks into something new - especially in summer! Discover three simple things to make with lolly sticks today…
Bostik essentials for your lolly stick crafts
In order for your kids to create your lolly stick crafts, you will need child-friendly adhesives to piece your craft items together. Say hello to Bostik PVA white Glu and Bostik Glitter Glu pens.
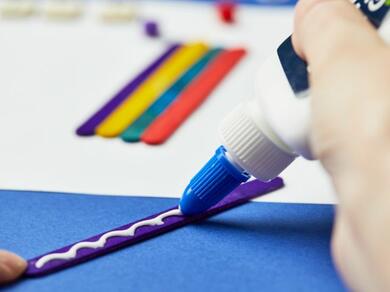
What is PVA glue?
Bostik PVA white Glu is a multipurpose, solvent-free white glue that dries clear, making it suitable for most arts and crafts projects – for adults and kids alike. It is ideal for scrapbooking, card making, modelling, school projects and much more.
Our PVA craft glue bonds to most materials including paper, card, wood and fabric. You can even use it to make slime, create a glossy finish in scrapbooks or posters, or mix it with powder for finger painting.
With a handy resealable cap, our PVA adhesive is easy-to-use and is formulated to be washable so that accidental spills on clothes and other surfaces can easily be cleaned up.
Tacky's tip: Bostik PVA white Glu is also UKCA and CE approved, giving you complete confidence that it is safer for children.
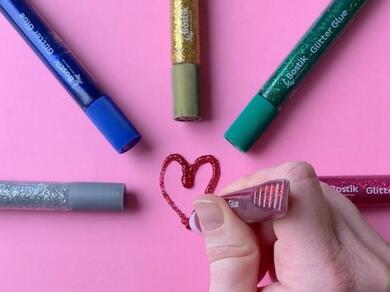
What are glitter glue pens?
Bostik Glitter Glu pens are a collection of six fine-tipped glitter glues in blue, pink, red, green, gold and silver. They are expertly designed as the convenient, mess-free alternative to regular, loose glitter as the flakes of glitter are suspended inside the glue.
Equipped with a precision nozzle, they are the ideal way to add glitter to cards, pictures, posters and pretty much anything else, giving you control as to where the glitter is applied for a neat finish.
As well as being solvent-free, easy-to-use and washable, our Glitter Glu pens are also UKCA and CE approved meaning they are safer for children to use.
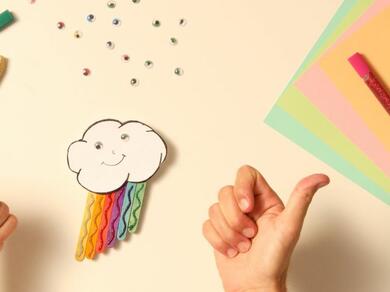
1. Make a rainbow DIY magnet
The first lolly stick craft project is to create a DIY magnet at home. In order to do so, you will need:
- PVA white Glu
- Glitter Glu
- Plain wooden and/or coloured lolly sticks
- Felt tip pens
- Strong scissors
- Small fridge magnet
- Thick white card
How to create a magnet at home - step-by-step
Step 1: Colour your wooden lolly sticks
Colour 6 or 7 wooden lolly sticks in the colours of the rainbow. Arrange them in a row on a diagonal slant, coloured side down.
Tacky's tip: For a quicker, but less eco-friendly alternative, you can buy coloured lolly sticks.
Step 2: Cut your lolly sticks
Use a pair of strong scissors to cut lengths of plain lolly sticks - an adult may need to do this.
Step 3: Glue your sticks
Apply a thin line of PVA glue to the plain lolly sticks and press them onto the backs of your rainbow sticks so that one sits a few centimetres from the top. The others should sit closer to the bottom so that the plain sticks connect the rainbow sticks.
Step 4: Glue your magnet
Check that your magnet is the right way around and apply a thin line of white PVA glue to the centre of the magnet. Press the magnet into place on the back of the lolly sticks and leave to dry.

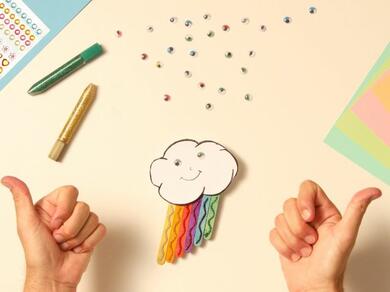
Step 5: Glue your cloud and rainbow sticks together
Turn the lolly sticks so that they are the right way up and apply PVA adhesive to the top of the rainbow. Then, press the bottom of the cloud onto glue so that the rainbow comes out diagonally from the bottom of the cloud.
Step 6: Decorate with glitter glue
Jazz up the magnet with glitter glue. We recommend using a red glitter glue pen to add a stripe on the red stick, a gold glitter glue pen on the orange and yellow sticks, a green glitter glue pen on the green stick, a blue glitter glue pen on the blue and indigo sticks, and finally a pink glitter glue pen on the violet stick and perhaps on the cheeks of the cloud face.
Leave to dry and that's it, you're done!
2. Make a DIY dragonfly
Our second craft is to make a craft dragonfly pet using lolly sticks. You will need:
- PVA white Glu
- Glitter Glu
- Plain wooden and/or coloured lolly sticks
- Felt tip pens
- Strong scissors
- Pair of small googly eyes
How to make a craft dragonfly - step-by-step
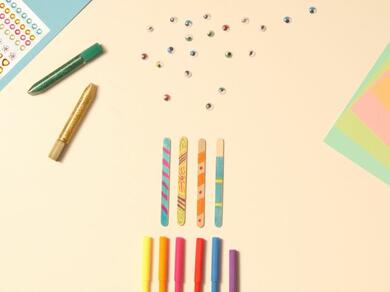
Step 1: Decorate a lolly stick into a body
Use felt pens to turn plain lolly sticks into patterned dragonfly bodies for as many DIY dragonflies as you want to create - one side of the lolly stick can be left plain, if preferred.
Step 2: Add googly eyes
Add a pair of googly eyes to your DIY dragonfly using the white PVA glue and stick them in place at the top of the lolly stick.
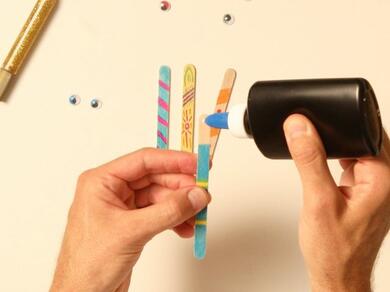
Step 3: Attach the wings
Apply a blob of PVA glue close to the middle of the lolly stick body (the coloured side) and place a plain lolly stick over the top at an angle. Then, place another lolly stick on top of the first wing, at an opposing angle. Hold so they set firmly in place.
Step 4: Add some sparkle
Use glitter glue to add some sparkle to the wings and body of your craft dragonfly – have fun experimenting with different colours.
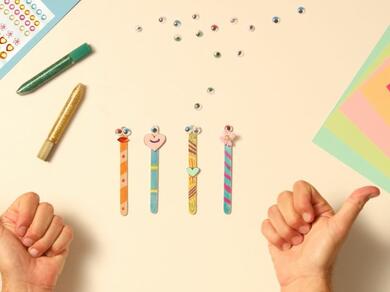
3. Make a mini monster bookmark
Our final craft project is to make a mini monster bookmark. To do so, you will need:
- PVA white Glu
- Glitter Glu
- Plain wooden and/or coloured lolly sticks
- Felt tip pens
- Strong scissors
- A pair of googly eyes
- Other small accessories - e.g. fake fur scraps, pipe-cleaners, small pom poms and similar
How to make a homemade bookmark - step-by-step
Step 1: Colour a body on your lolly stick
Use felt pens to turn a plain lolly stick into the body of a colourful monster – this is the time to let your creativity run wild.
Step 2: Glue your hair and googly eyes
Apply a thin line of white PVA glue to the top 2-3cm of the lolly stick. Then, attach the fake fur as hair and two googly eyes just underneath the hair. Press the hair and googly eyes firmly into place.
Use a pair of strong scissors to cut lengths of plain lolly sticks - an adult may need to do this.
Step 3: Leave to dry
Allow the PVA to dry.
Tacky's tip: the thinner the layer you apply, the quicker it will dry. However, be sure to apply enough adhesive so your items have a strong, solid bond.
Step 4: Decorate with glitter glue pens
Use the Glitter Glu pens to bring your DIY bookmark monster to life with wavy lines, scallop-edged ‘scales’ and similar patterns. Remember, have fun and be creative.
And that's it, you're done!
Time to clean up
- Bostik PVA white Glu should have the nozzle cleaned before you turn the nozzle clockwise to close the bottle. This will stop the glue from drying out. Any excess glue can be removed with a damp cloth and the product can be washed out of clothes using warm, soapy water - ideally before the glue is dry.
- Bostik Glitter Glu pens should have the nozzle cleaned before replacing the cap. Excess adhesive may be wiped off with a damp cloth before it dries. Spills can be washed out of clothes before the adhesive is dry.
For full cleaning information, please refer to the technical data sheets for Bostik PVA white Glu and Bostik Glitter Glu.
Bostik offers a wide range of stationery and craft adhesives, so no matter how complicated your next craft project may be, there's a stationery glue at hand to help.
Plus, if you're looking for some craft inspiration, you can browse our blog and filter #CraftWithBostik for all Bostik arts and crafts ideas.