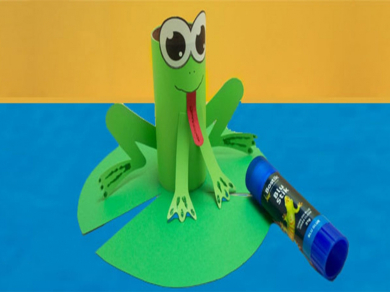
Cardboard Frog

Leap into creativity with an upcycling twist with our Bostik Frog project. This tutorial will guide you through crafting an adorable frog using glue and toilet rolls. Perfect for kids' activities, educational projects, or just a whimsical addition to your decor, this DIY project brings the charm of frogs to life. Follow our step-by-step instructions to create and personalise your own Bostik Frog, exploring different colors and designs to make it uniquely yours. Hop to it! 🐸

This project was made by our Bostik Buddy, Sonia - follow her on Instagram

Instructions

Step 1: Print template

Print the template and find a clean surface to work on. Make sure you have everything you need.

Step 2: Cut paper

Cut one piece of green paper to the same height as the toilet roll. Make sure it is long enough to wrap around the roll and overlap a little at the end.

Step 3: Put together

Cut the legs out loosely from the template. Blu-Tack them to a piece of green paper. Cut around the template. Once cut out, remove the template and Blu-Tack. Repeat with the tongue on red paper. Curl the rounded end of the tongue around the marker so the end curves upwards.

Step 4: Decorate

Decorate the legs and tongue with Glitter Glue and leave to dry. Using the Blu Stik, glue the green paper around the toilet roll.

Step 5: Finish

Using the Blu Stik, glue the straight legs onto the front and the bent legs onto the back. Stick the eyes on the front so the top half of the eye is above the end of the roll. Apply glue to the top of the tongue only and stick just below the mouth. How adorable!

See all products