How to make a unicorn pen pot holder

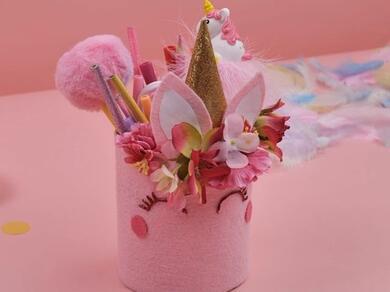
Looking to try your hand at a DIY cute pencil holder that’s easy, affordable and guaranteed to raise a smile? This unicorn pen pot is a brilliant way to upcycle an old pen stand and turn it into a personalised desk accessory.

Getting children involved in a simple craft like this DIY pen holder isn’t just about keeping them busy on a rainy afternoon. It helps develop fine motor skills, encourages creativity and gives you a chance to chat and work together. Best of all, once finished, they’ll feel proud seeing their very own unicorn pen pot taking pride of place on their desk.

Bringing fantasies to life

Let’s be honest – kids have loads of stationery, yet the pencil you need always seems to disappear. A pen holder helps keep things tidy, and a handmade one makes organising feel fun rather than a chore.

A unicorn pen pot ticks all the boxes: it’s colourful, magical and totally personal. It also makes a lovely gift or a cheerful addition to a homework desk – anything that makes schoolwork feel more appealing is a win in our book.

Step-by-step: How to make a unicorn pen pot

This DIY cute pencil holder uses simple craft materials and doesn’t need any specialist tools - just grab your glue, an old tin can and some craft accessories and this project can be completed in no time. Follow along for our step-by-step guide...

Instructions

Safety first!

Always ensure that children are supervised when handling sharp objects. If required, you can let your child draw the ears and have an adult cut them out.

Step 1: Measure and cut the felt

Lay the pink felt flat on the table and measure the height of your pen holder against it. Draw a straight line and cut out a strip to fit.

Step 2: Cover the DIY pen holder

Apply a thin layer of All Purpose glue on one end of the felt strip. Align this to the pen stand and press it firmly onto the pen holder and wrap the felt around the cylinder. Trim off any excess, add more glue and stick the end down neatly.

Step 3: Make the ears

Draw two triangular shapes for the ears on the pink felt and two smaller ones on white paper. Cut out all four ears and glue the white pieces onto the pink felt using All Purpose glue.

Add a thin line of glue along the bottom edge of each ear cutout and stick them to the inside top edge of your unicorn pen pot.

Tacky's tip:

Always remember to screw the lid back on the tube of glue after using it.

Step 4: Create the horn

Cut a square from the gold paper. Add a line of glue along one edge, then roll the paper diagonally into a cone shape. Press to secure and seal with more glue.

Once dry, glue the horn between the ears.

Tacky's tip:

Anything designed on a unicorn theme must have some sparkle. So, how about using a gold glitter sheet for the horn…

Step 5: Give the unicorn a face

Draw eyes for the unicorn with a pencil or coloured pen. You could use a thin line of glue instead and add glitter to create sparkly eyes for the unicorn.

Then, cut out two small circles from the dark pink paper. Stick these to the pen holder with All Purpose glue to highlight the cheeks.

Step 6: Add flowers

Apply a thin layer of glue over the back of each artificial flower and stick them just under the horn and around the ears to finish your unicorn pen pot.

Let's recap!

This DIY pen holder is ideal for birthday parties, playdates or classroom craft sessions. Let each child decorate their unicorn in their own style and see who finishes first – creativity encouraged!

Whether you’re crafting on a rainy afternoon or looking for a simple upcycling idea, this unicorn pen pot is a lovely way to turn everyday items into something magical.

Bostik offers a wide range of craft and stationery adhesives, so whatever your next DIY idea, there’s a glue to help bring it to life. Happy crafting!

See all products